Do you have the desire to Root your phone? dr.fone is all in one tool for android. It has many important features for Android devices. Like Rooting, Backup and reset, Password unlocking, Software upgrading, and many more. dr.fone has the ability to Root any smartphone, even more, you can Root the most failed device with it. So stick with this article and learn “How to root any smartphone with dr.fone”.
Now if you scared to lose your Android phone then I highly recommend reading How to Root Android phone safely post for securing phone live. I also explained tons of things about Root related like benefits, disadvantages, and stuff like that. So, I think you need to read it once. This will probably clear your almost all the doubts about Rooting. Please read it once!
After reading that, you will get a clear-cut knowledge about Rooting. Now come to the topic. So, first, let me explain every term of the topic today like Root/Unroot. Knowing these terms can help you Root/Unroot your Android phone using dr.fone.
Contents:
What is Android Rooting?
Android Rooting is a process in which its full power gets unlocked. During Android phone manufacturing, some restrictions get added by the company. And after Rooting Android phone, all the restriction that has been added by phone manufacturer company gets removed.
Once an Android receive Root privilege, it can do advanced tasks which were restricted by phone company like Installing ROM and Kernel, Using advanced applications, etc. Also, there are some experiments done by Android developers and what they have found is once rooting completes, it’s performance and Battery life improves drastically.
And it happens because after an Android phone gets rooted, a new authority gets installed on the phone which can control Android processing and other systems of Android like accessibility.
What is Android Unrooting?
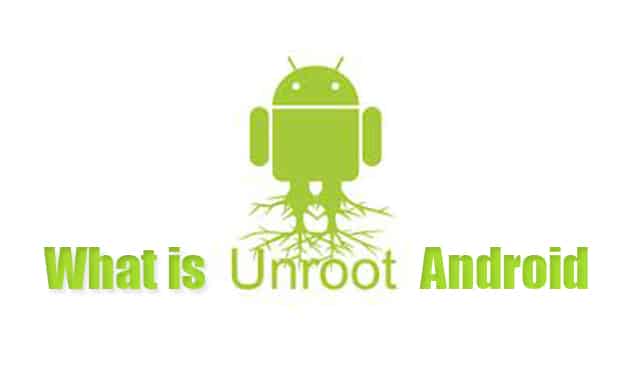
The process of uninstalling the Root privilege from Android is called Android unrooting. In this process, all the restriction made by phone company gets restored and the user can’t do advanced tasks like using Advanced apps, Flashing ROM, etc.
Also, when Android unrooted, the stability of Android increases and doesn’t crash or stuck too much when you open an app, do browsing. And after unrooting, you get elected to access some popular transaction app which was restricted when having Android rooted.
The best benefit you can gain by unrooting your Android is you can get back your phone warranty. Yes, it’s true. But only when the validity of the card is not expired.
So, hoping Rooting and Unrooting term is clear for you! Now, we are going to root our phone and for that, you need to complete some pre-requisite.
Things Which Required Before Rooting Android with dr.fone
Here are some important things you need to do before Rooting your Android with Dr. fone:
- You need to install the drivers of your Android phone to your computer. This will ensure the connectivity between computer and Android. If you don’t install the drivers, you can’t be able to connect your Android with a computer. And if somehow it gets connected, the connection will get lost in the middle process and you will lose your smartphone.
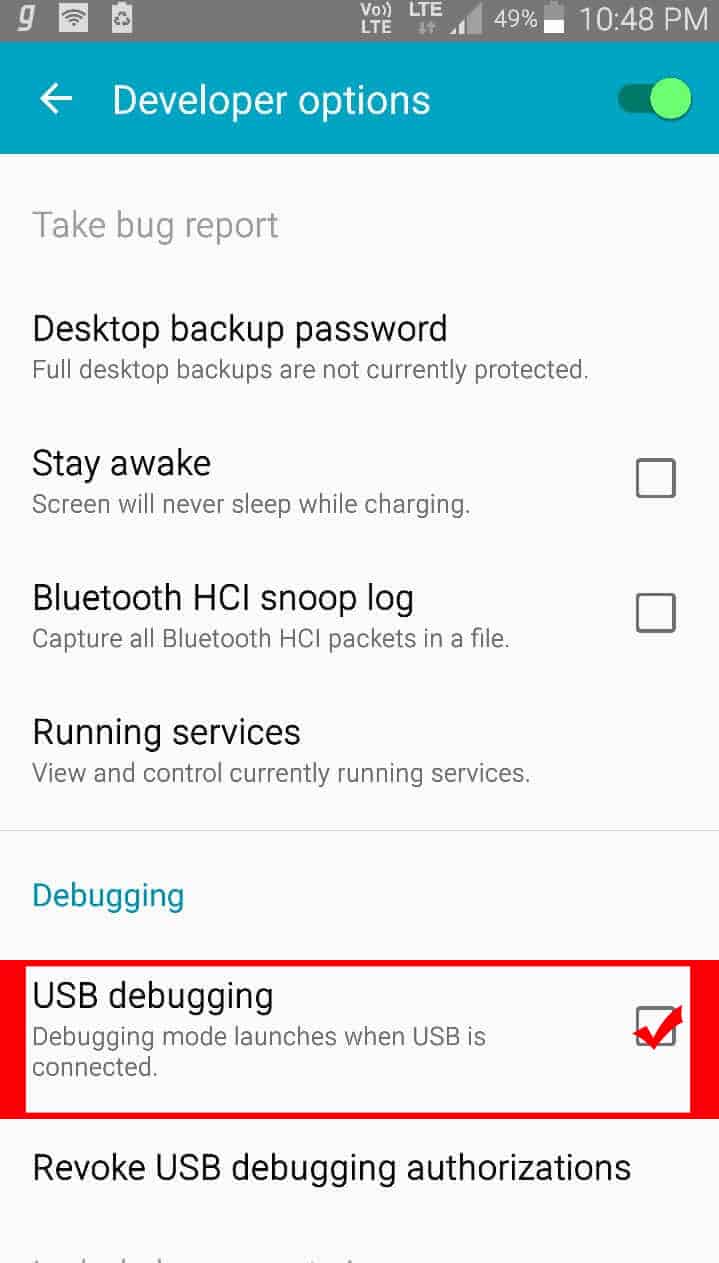
- Enable USB Debugging in Developer option. This is the most important process you need to do after installing the phone driver on the computer. USB Debugging helps the software to install the Root app in the Android system and If you don’t allow it or enable it. You will never be able to Root your phone with dr.fone.
- Create a full backup of your Android data like Contact, Media files, Gmail accounts in your SD card. Backup is as important as the health of your phone. However, creating a full backup of your phone will ensure you that you will never lose your phone. Whenever something happens wrong in the Rooting process, you will be able to get in default more by restoring the backup. And that’s why it’s most important.
After doing these things, you are ready to Root your Android phone. Now follow the steps from below to Root your Android phone with dr.fone.
Read More: How to Make Free Space on Android Phone Ft. Files Go by Google
How to Root Android Phone with dr.fone
Here is the full process to Root Android phone with dr.fone:
- First, download and install the dr.fone software from here.
- After installing, enable USB Debugging on your Android phone.

- Now connect the Android with a USB cable.
- Open the dr. fone software and Click on the Root tab.
- After opening the rooting tab, select your device to connect and click next.
- Wait for checking the root status and after that, click on the Start button.
- Wait again to detect your Android phone (It may take 15-30 minutes).
- After, click on the “Root” button to complete the Root process.
- Well done! You successfully rooted your Android phone.
Remember if you fail in rooting your android phone 3 times simultaneously, restart your Android and try again. If you again fail after Restart then change your USB cable and try again.
Most of the time faulty USB cable is the reason for failing Root. So if you get fail too many times in terms of Android Rooting then replace the USB cable with New one.
You may get rooted at first try after replacing the cable. So, if you don’t have to buy one then at least beg to your friends and relatives for their USB charging cable.
Now if due to some reason you just want to unroot your Android phone Or your android starting hanging out somewhere process then follow steps below to Unroot your Android. Unrooting your Android will stress it free and your Android will gain some fresh breath.
Read More: How to Quickly Solve “Storage Space Running Out” on Android
How to Unroot Android Phone with dr.fone
Here is the full process to Unroot Android phone with dr.fone:
- Connect your Android phone with USB Debugging enabled.
- Open the dr. fone and then click on the Root tab.
- Select your device to connect.
- Wait for checking the device Root status.
- After, click the “Unroot” button and wait to complete the process.
- Well done! You successfully unrooted your android phone.
Remember your Android phone may take several reboots in the process of Unrooting. Don’t detach the USB cable after a single reboot. This process is a critical process and that’s why in some phones it takes 3-4 reboots.
If your phone still doesn’t unroot means you need to restart your phone. This will make a fresh start and when you again try, it goes success. And this what I learned my self about rooting and unrooting an Android phone.
Read More: Top 3 Best Screen Recorder for KitKat Android Version (No Root)
Conclusion
So, this is the process to Root/Unroot Android phone using dr.fone. This one is the easiest and most effective way to gain and lose Android Root. The dr.fone software is one of the famous free tools that provides tons of features for Android phones.
Even, I have rooted my Samsung Galaxy Note 4 with dr.fone and it gets rooted at first attempt. Now, it can Root 7000 plus Android devices without any issue. So, if you are really tired of Rooting/Unrooting Android phone then you should definitely try this software.
Hope it helped you? If so, do help us by sharing this article. Also, comment below if you have any questions related to this article. I will answer and try to solve your problem.
I can’t unroot my phone : (Unroot device fail)After 1 minute of process What can i do? Please answer me this question . Thanks
Hi, Juan F Garcia
It’s okay if your device is always failing while unrooting. I recommend trying different unroot software, there should a compatible software to unroot your device. If nothing works, then you can format & install Stock ROM. Doing that will automatically unroot your Android phone.
I hope it helps!
Y don’t have the unroot opcion. Only have the phrase your phone is rooted .
such an amazing info. very helpful post for me.